
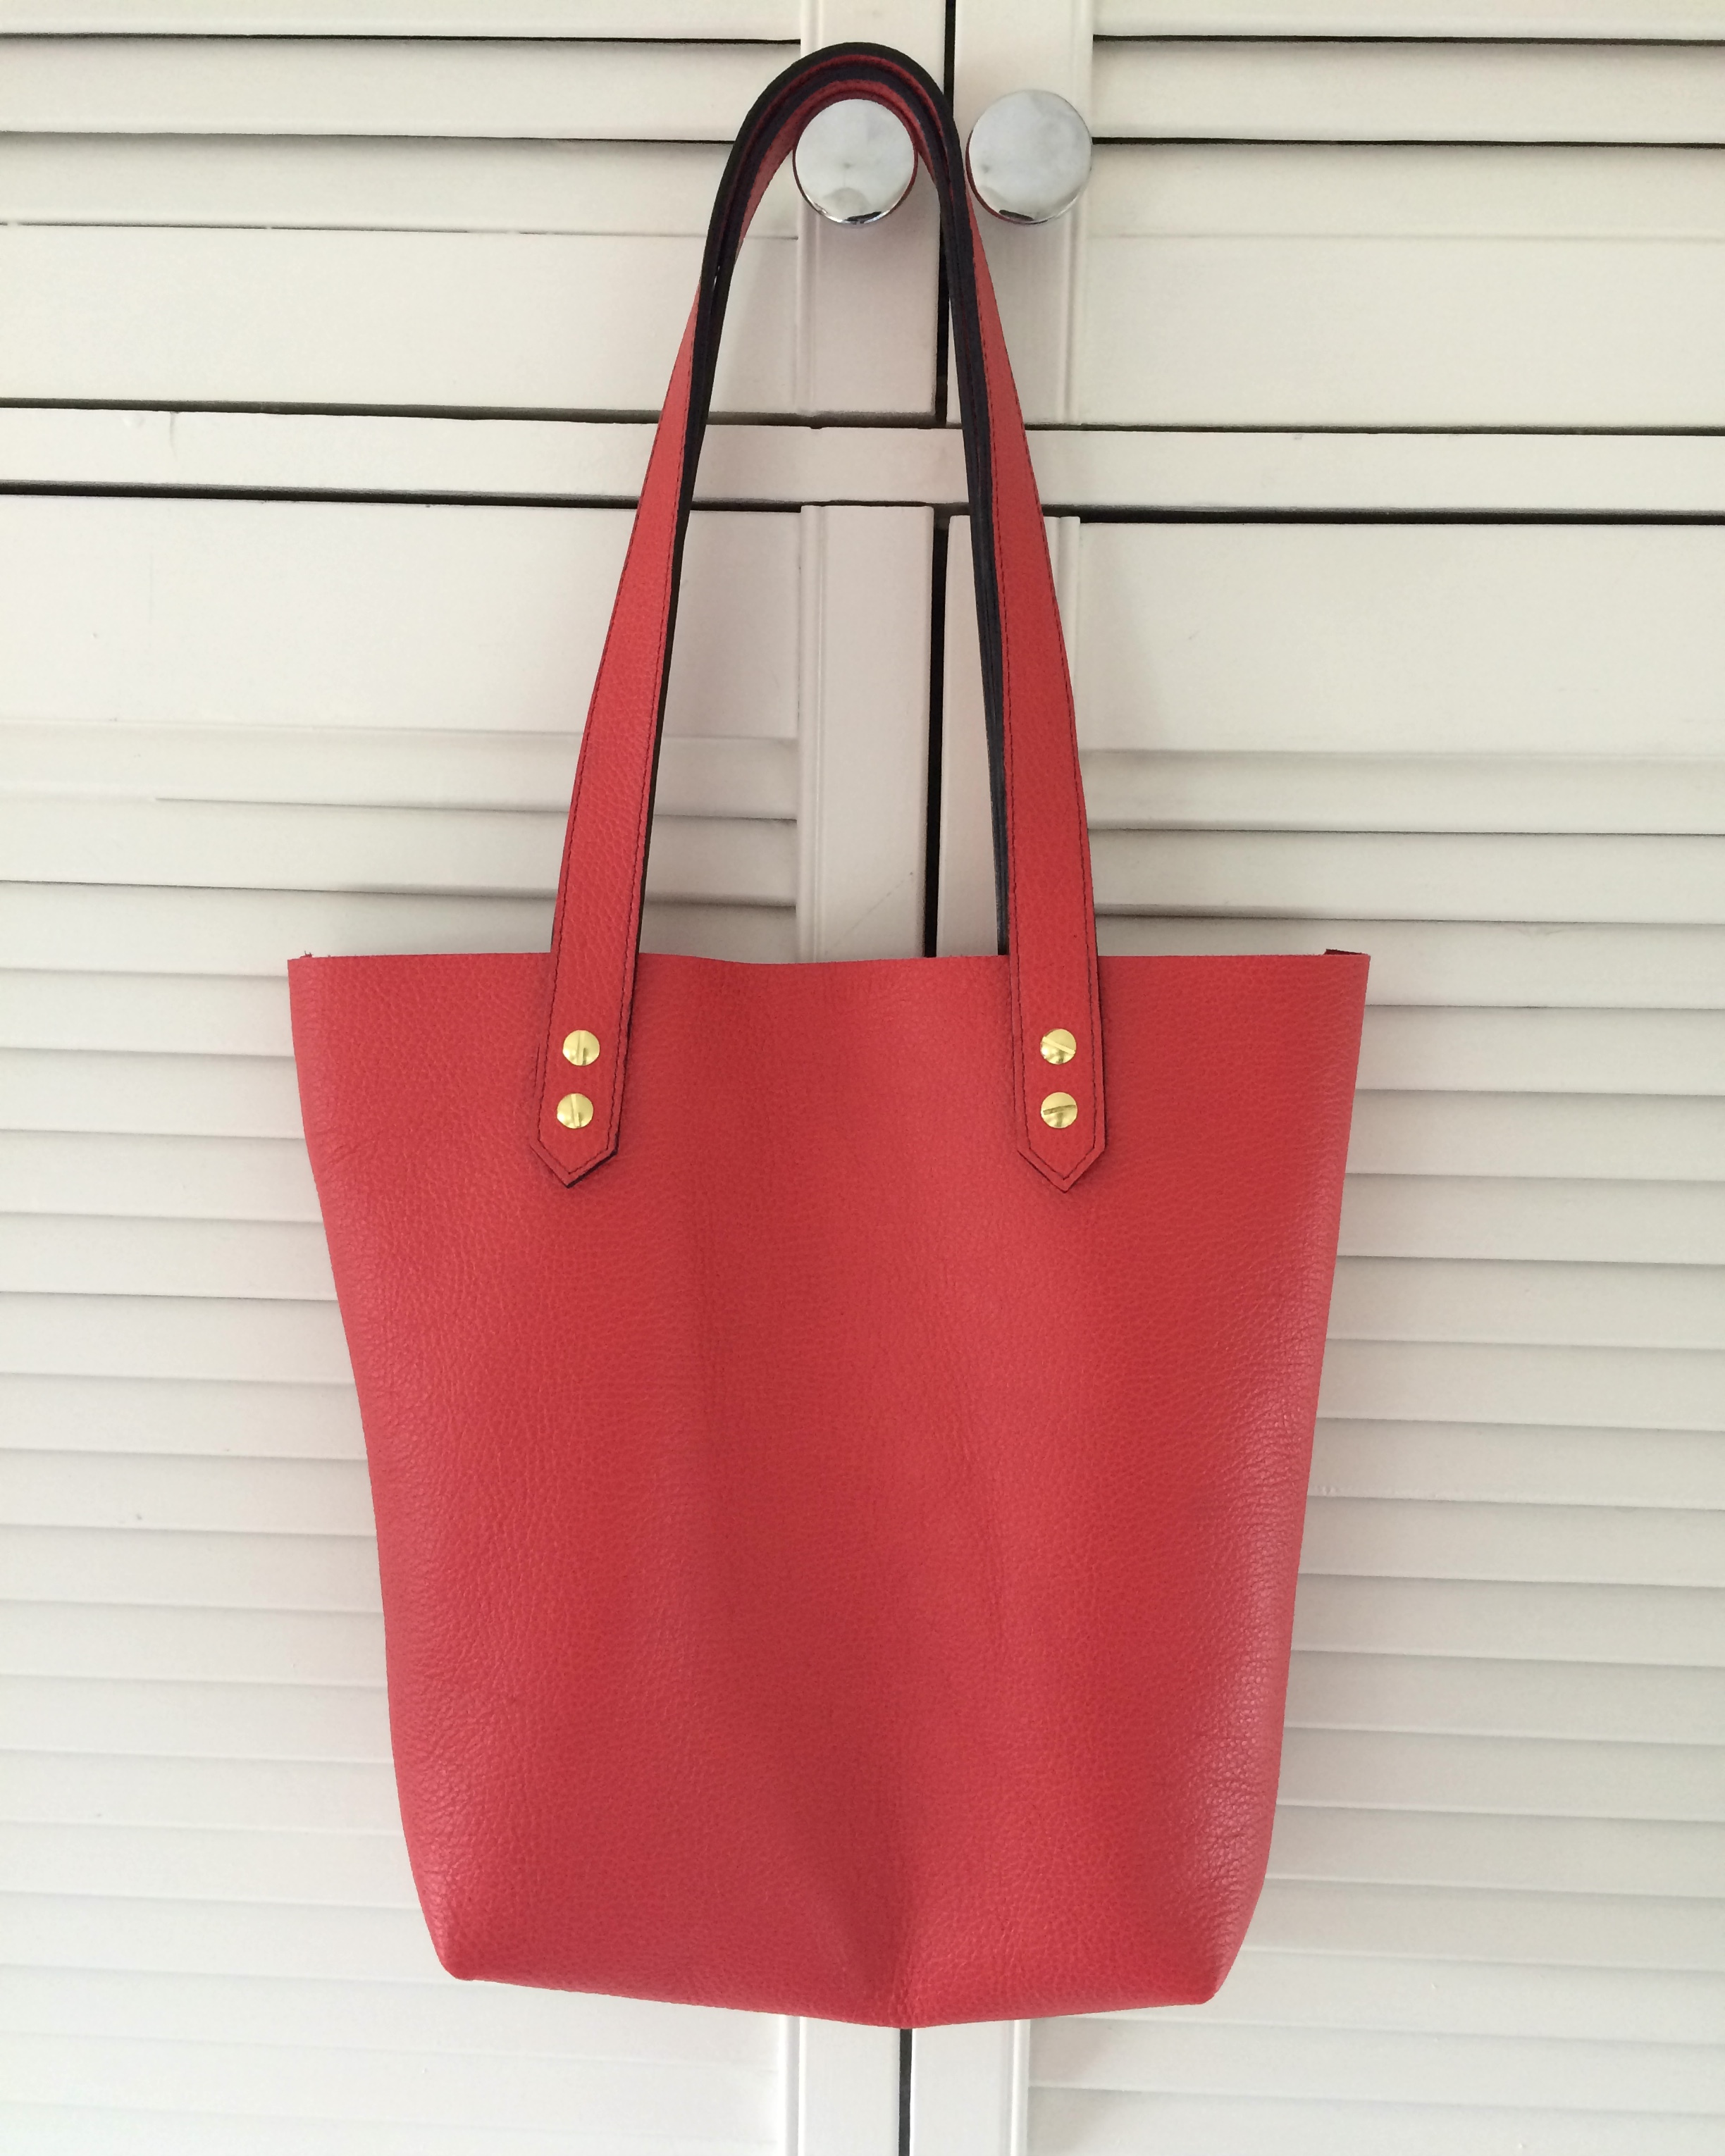
My handbags never seem to be large enough to fit everything that I need and I'm often carrying around a second bag, so I decided to make a large leather tote for my next project.
I picked up this beautiful pillar box red leather hide from the Tandy Leather factory stand at one of the London craft fairs (they sell online too) well over a year ago and I've always had it earmarked for a project like this.
To avoid spending hours creating a new bag design, I chose a simple T-shape construction similar to my turquoise leather clutch (minus the flap), with long handles so the bag would sit comfortably on my shoulder. I didn't want to bother with any sort of closure so i added an inside zip pocket into the lining of the bag.
I used some sandy coloured linen for the lining that I had already screen printed with a bright red zebra motif design (the design is based on the body of a zebra, which was then cropped, rotated and repeated in order to create the design). Just before I was about to insert the lining into the bag, I came up with the idea of adding a pompom trim to the inside of the lining, which I think adds a bit of fun to what is otherwise quite a simple bag!
I'm so pleased with the end result - for once I didn't rush any part of the construction, so the quality of the finishing looks pretty professional!
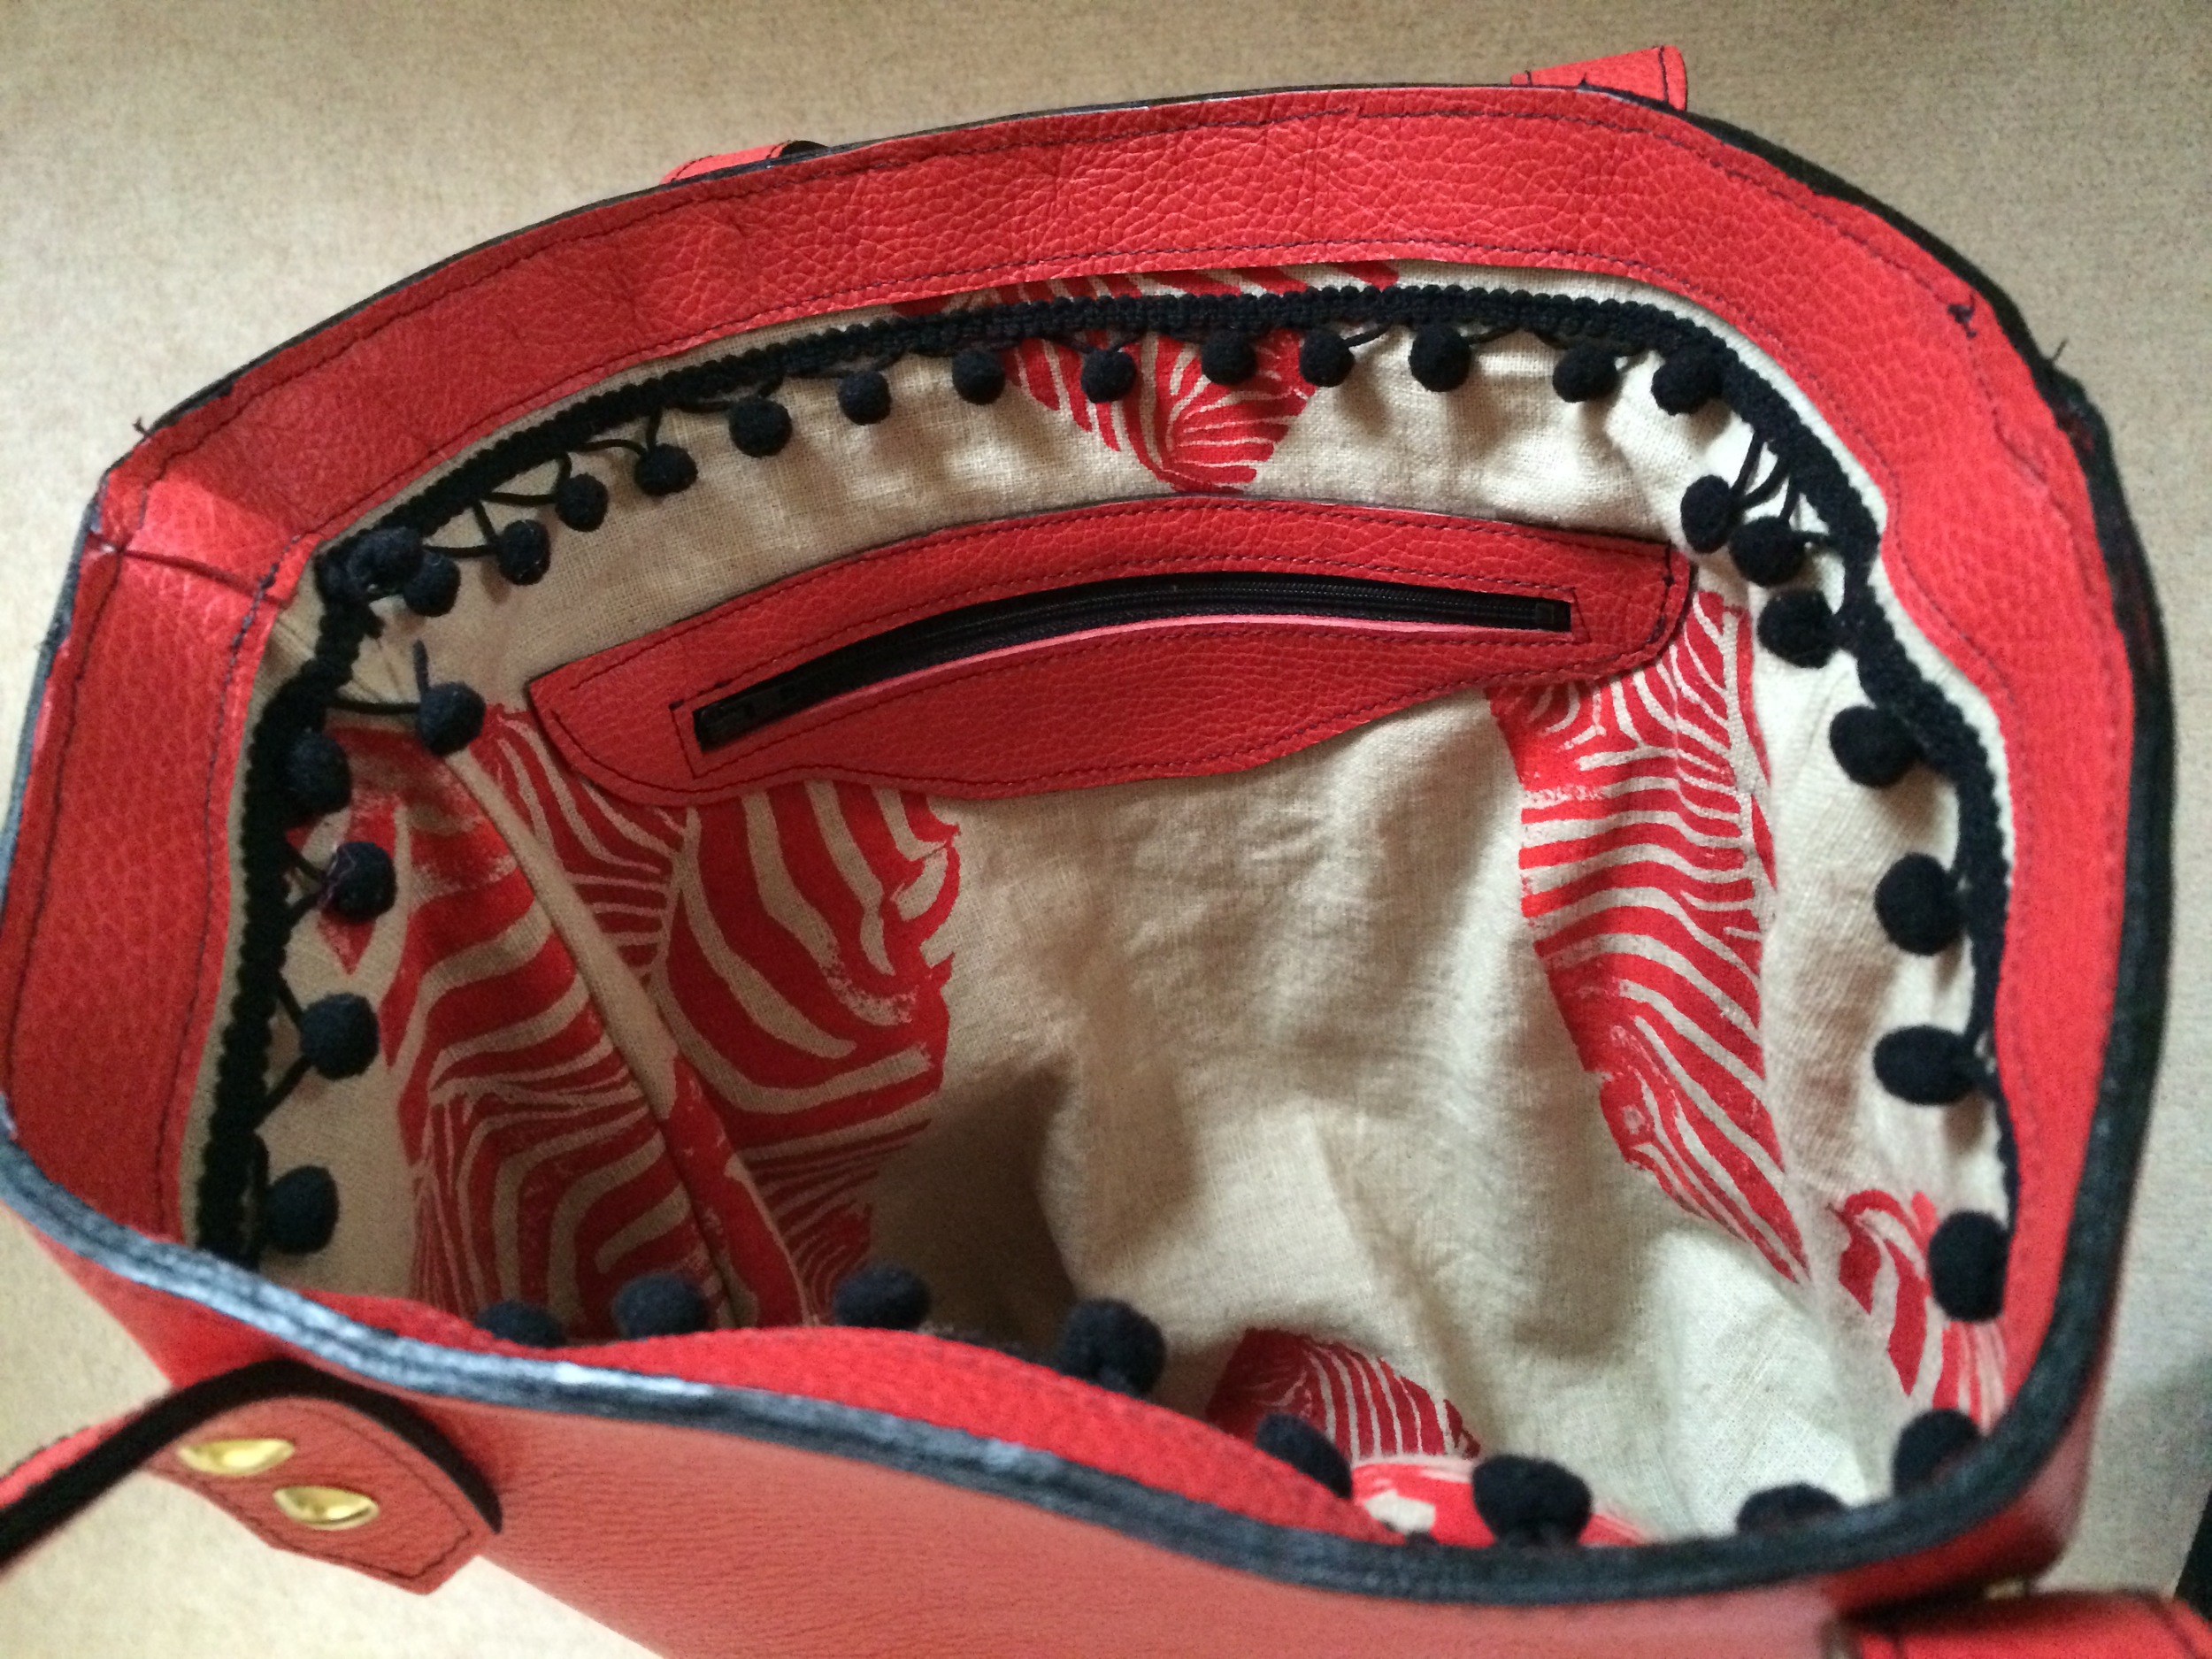

A close up of the pom pom trim and inside pocked detail
The all important details:
- T-shaped construction: as with my turquoise leather clutch, I drafted the bag design using teh T-shaped construction method.
- Straps: In order to create perfectly straight straps for my bag, I used a "strap cutter" for the first time (bought from the Tandy Leather Factory). This is a fantastic tool that takes all the hassle out of cutting long thin strips of leather.
- Securing the Straps: I picked up some brass screw rivets from the Tandy Leather factory (apparently they are called "Chicago Screws"), which were just right for attaching my handles to the main bag.
- Inside Pocket: since my bag wasn't going to have a zip/closure to protect my valuables from pesky thieves, I added an inside pocket to the lining - which was fairly straightforward to do (searching on Pinterest came up with a few tutorials).
- Finishing the raw edges: I'm not lucky enough to own a skiving machine, so all my bags tend to have raw finished edges (which tends to make them look a bit homemade. To make sure they looked super professional I used the following on the raw edges (all available from Tandy Leather):
- Eco-Flo Gum Tragacanth: a thin layer of this transparent glue is applied to the raw edges. Before the glue dries, you use an "edge slicker" (see below for photos) to repeatedly rub the edges. The heat produced from friction of rubbing the wet glue with the edge slicker appears to smooth out the corners of the raw leather edges. This process is known as burnishing and can be repeated several times to achieve the desired level of burnish; and
- Fiebings Edge Kote: once the edges have been neatened up with the Gum Tragacanth, you can "paint" the raw edges with Edge Kote (available in a multitude of colours and comes either in acrylic or dye) for a final professional touch. I chose black acrylic which was nice contrast against the bright red leather.
- Optional Detail: I hadn't noticed that the leather had some scratch marks and other imperfections across much of the hide (that'll teach me for buying it on the cheap!). I was going to add a strip of black suede leather to sit over the centre of each side of the bag to cover some of these marks (screen printed with the same zebra motif design used for the lining) but ultimately I decided against it...

I used a simple T-shaped construction for my bag, with the top of the bag being wider than the bottom to create the classic tote bag shape.

Pattern pieces for the leather and lining all cut out and ready to sew (the leather hide wasn't big enough so I had to cut the bag in 2 pieces

A close up of the handles showing how accurate that strap cutter was (and my stitching wasn't too bad either!)

The lining of the bag, before the pom pom trim was attached, showing my hand printed zebra design and inside pocket detail.
essential pieces of equipment:
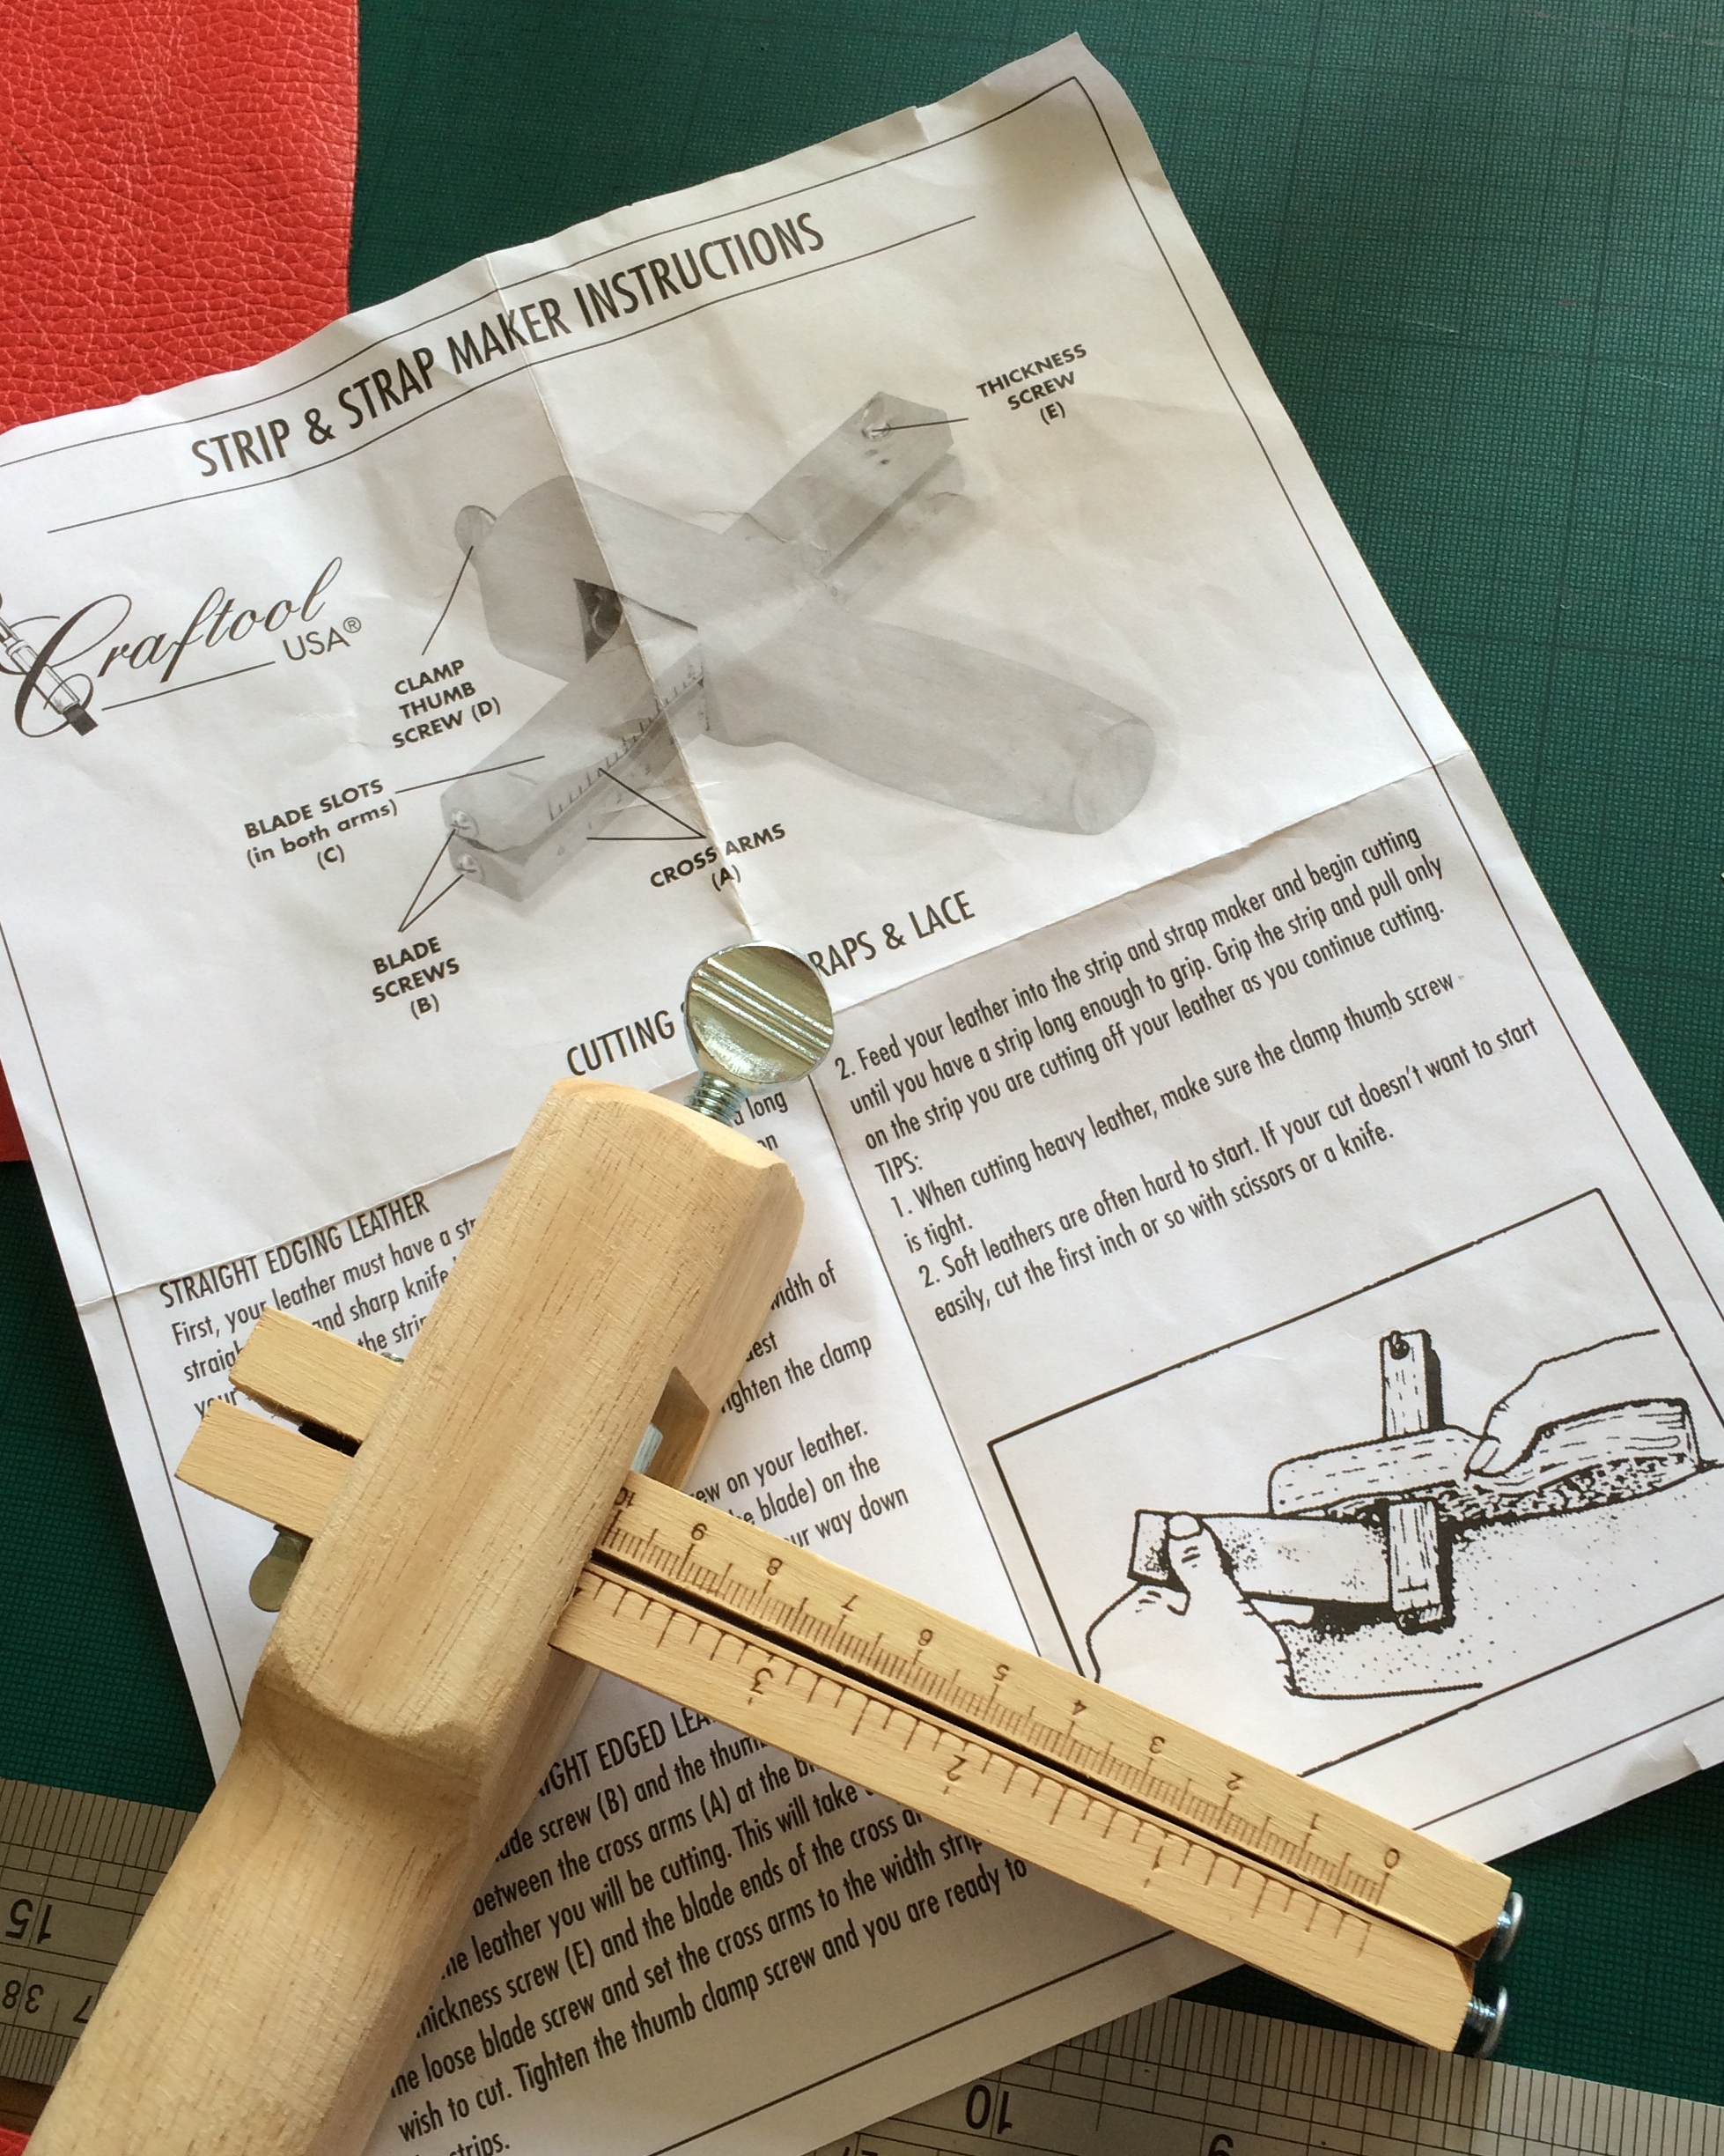
The fantastic strap cutter, which eliminates all the stress of cutting long strips accurately! You can just about see how it works from the bottom diagram on the instruction sheet.

Clockwise from left to right: the edge slicker; used in conjunction with the Gum Tragacanth to burnish and neaten the raw edges; Fiebing's leathercraft cement (i.e. leather glue!); Edge Kote to paint the raw edges; and finally the brass screw rivets (or Chicago screws as the website calls them).